Tuesday 31 December 2019

Merry and Bright Cushions and Present Quilts

I had been wanting to make one of these cushions for a few years having seen several made by different people whose blogs I read.  I did a bit of embroidery this summer so felt I was now up to the task!  The pattern is by Amy Sinibaldi of Nana Company and can be found here.  I had so much fun making the first one that I made a second one too.  Since I gave them both away, I can see a third one in my future to keep!

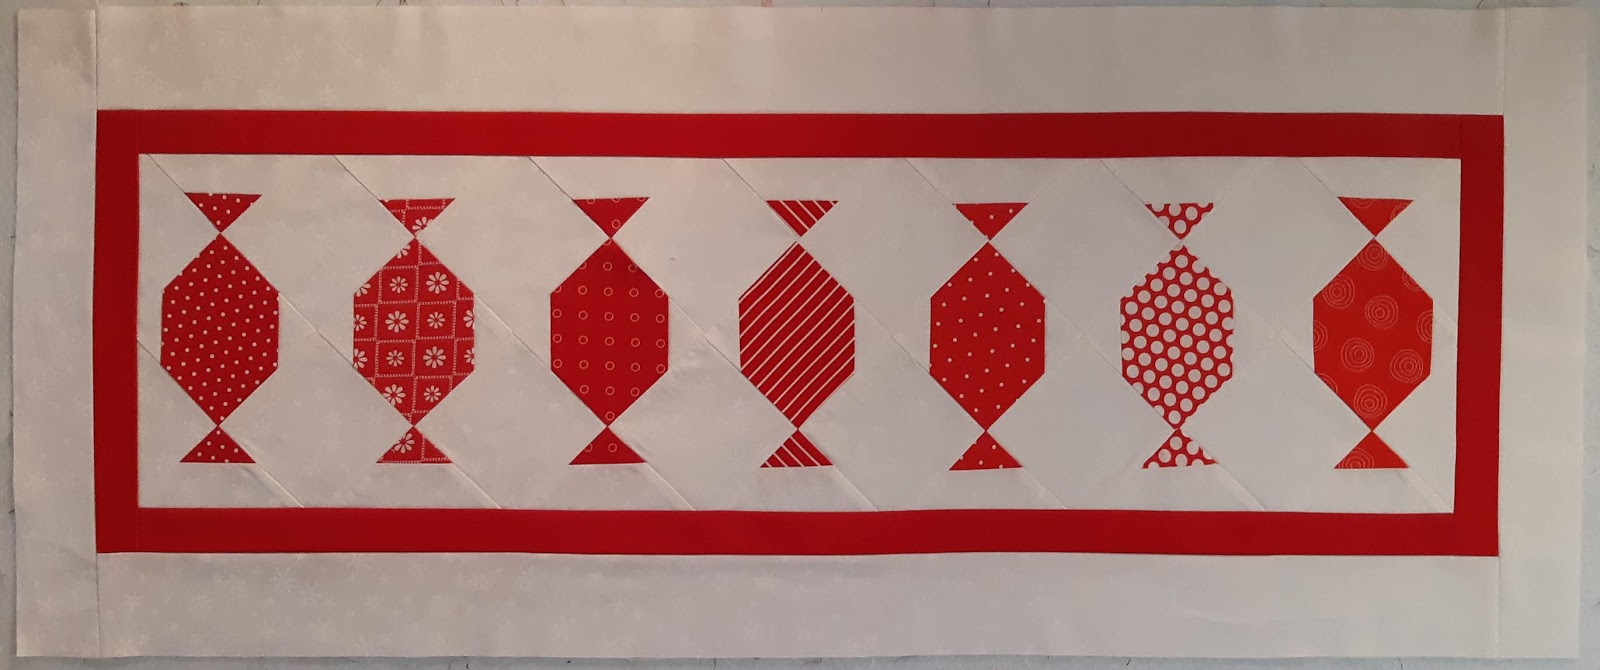
Here is the first one.  I was working with 1.5" left over Christmas fabric scraps so luckily sewing 4 of them together gave me the required 2" finished squares the pattern called for.  The white fabric has tone on tone white snowflakes.


And here it is embroidered.


 Here is a close up of the fabric I used to make an envelope style back and how nicely the glue basted binding corner turned out.  I washed it once it was finished to remove all traces of the washable school glue.


Here's a picture with the nicely stuffed cushion and a bit of the Christmas tree showing in the background.  I should have turned the tree lights on.....


If you go to my very first blog post of 16 January 2017, you can see some Christmas items I made using owl fabric for my son and his fiance.  I still had a bit of that fabric left so decided to make a second cushion since the strip of owls fit the dimensions of the cushion pattern perfectly.  Here it is pieced.


And embroidered and bound.


Here's the envelope backing.


I was able to use the same binding fabric and embroidery thread on both cushions and they matched each cushion perfectly!  Here's the finished owl cushion.


The first cushion went to my daughter and her husband and of course the second went to my son and his fiance.  This is definitely a make again project and the embroidered wording could be changed to anything you want!

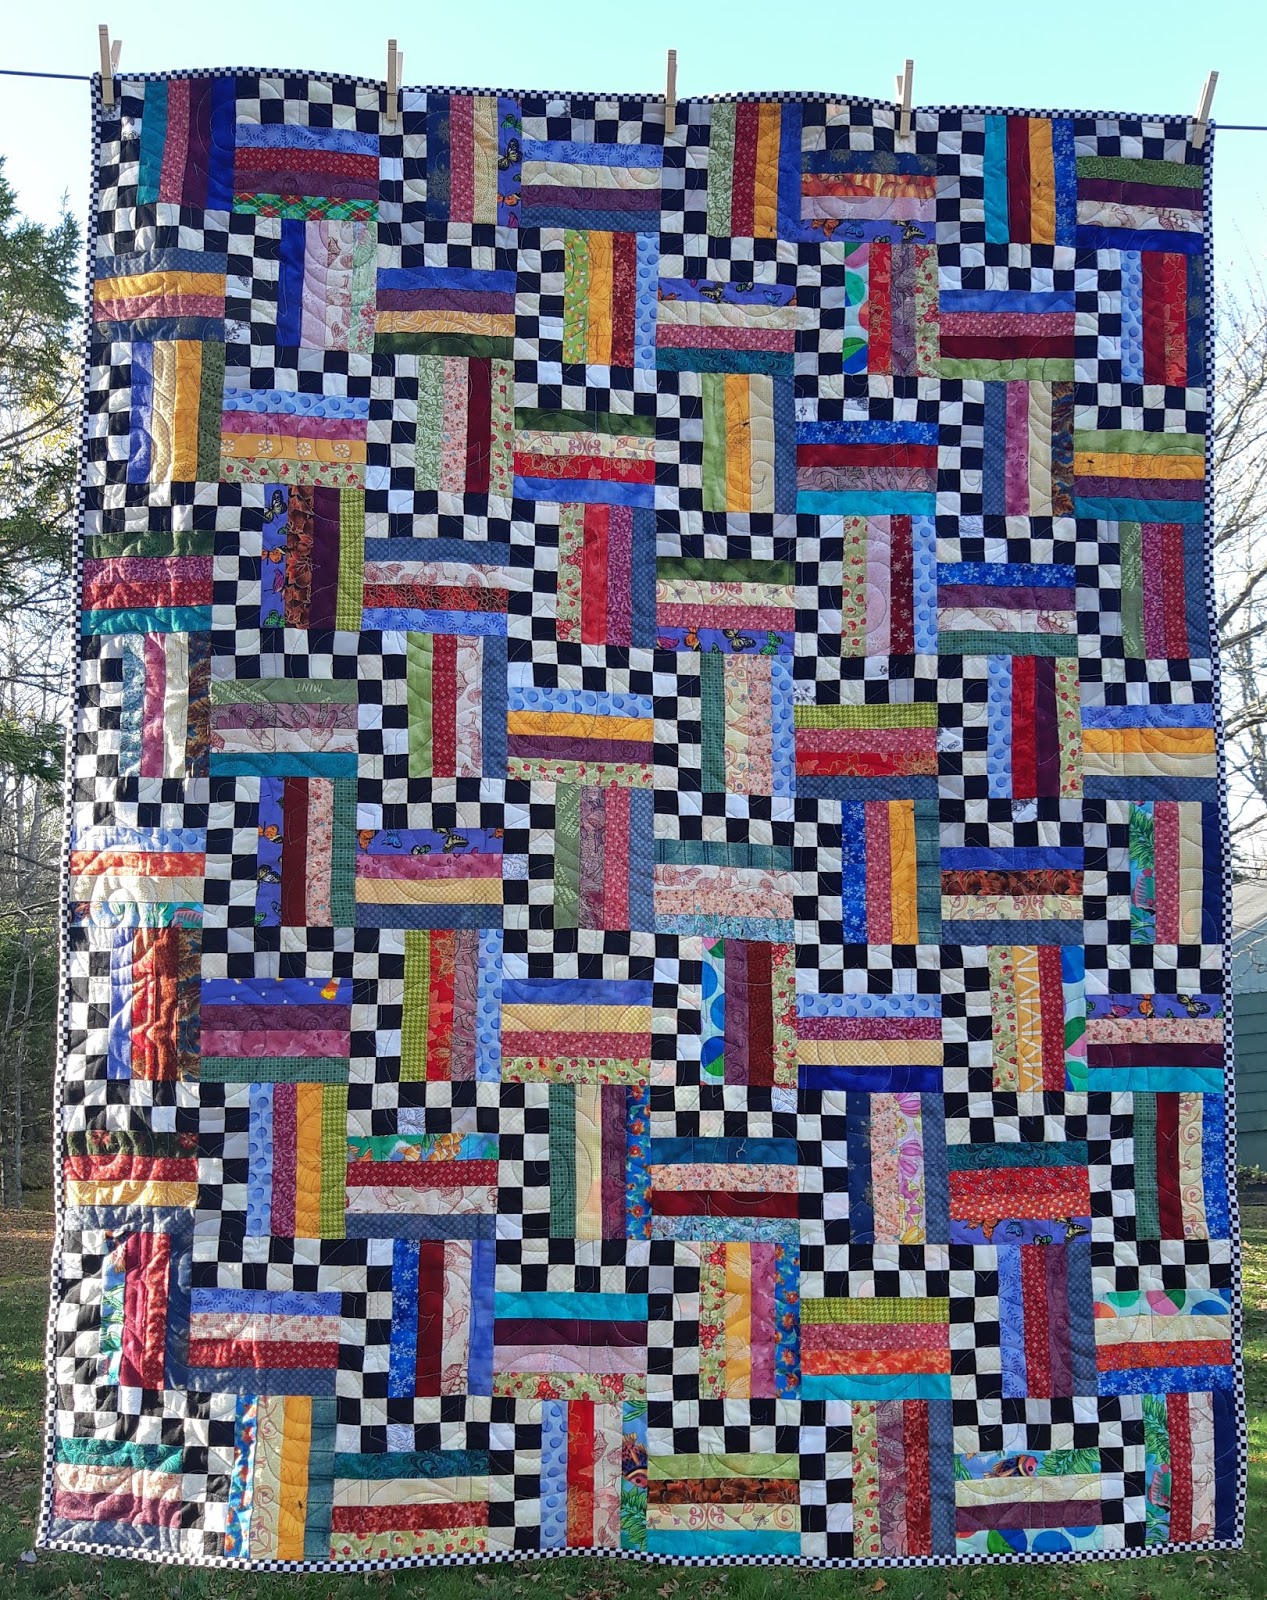
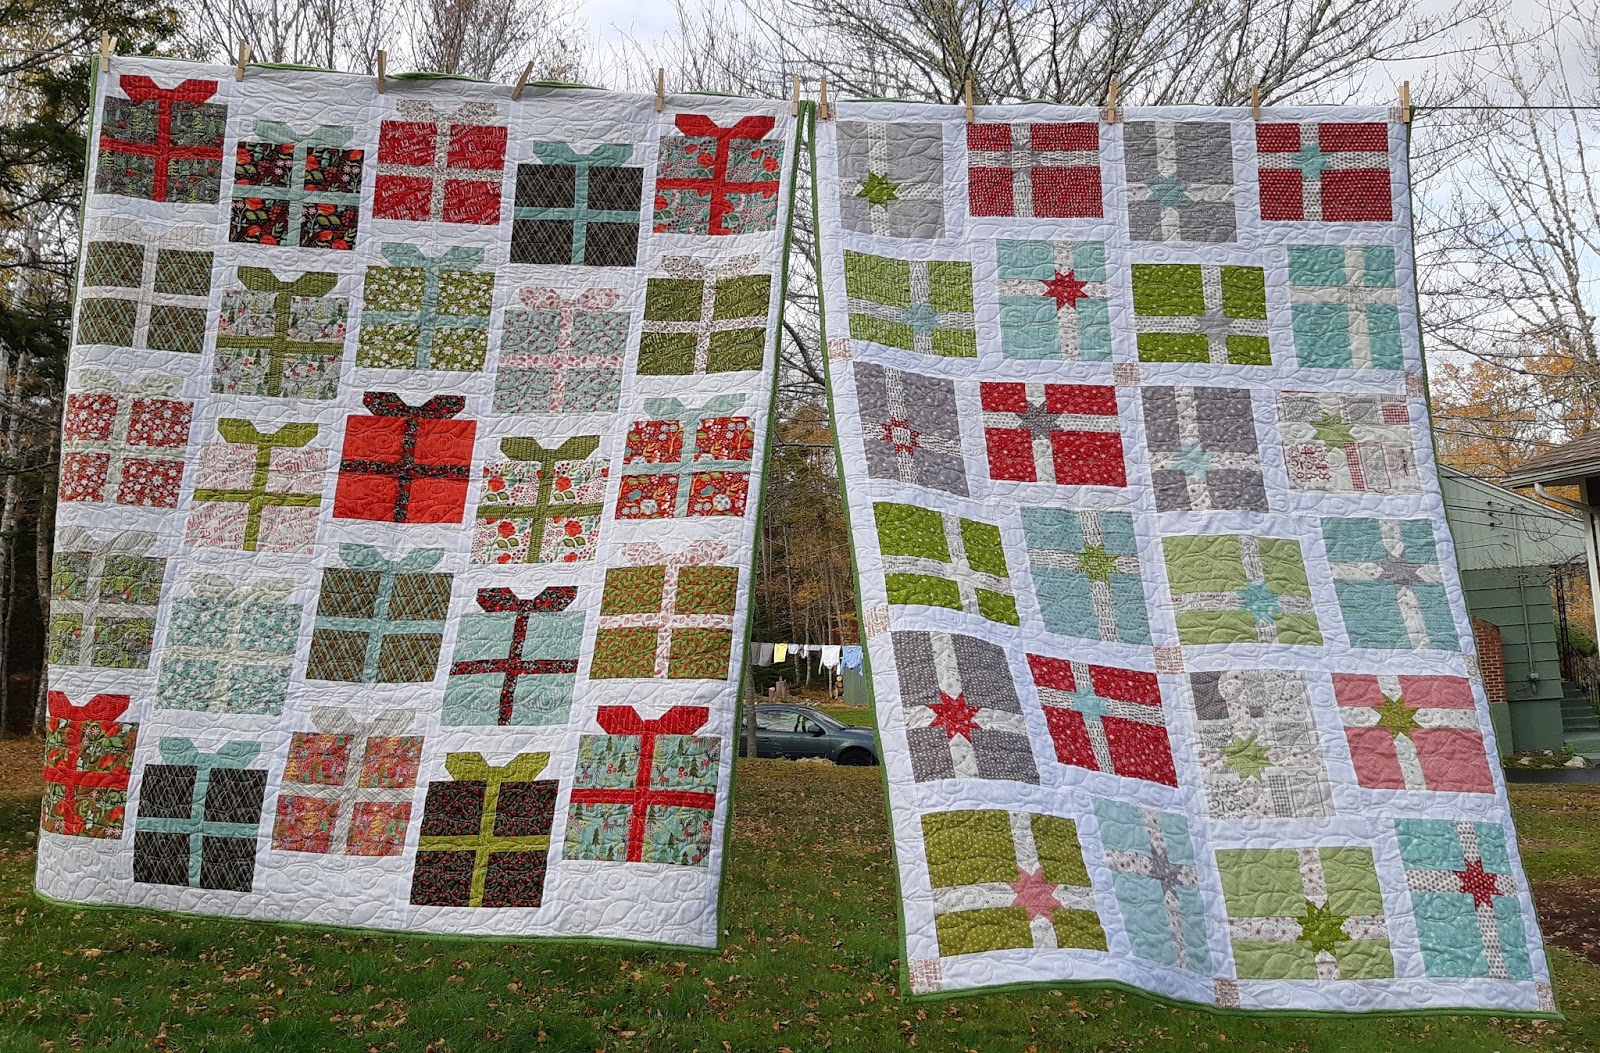
The two Christmas Present quilts I made were also given to my children and their partners. 

Ainsley and Jack opening their quilt Christmas morning.  Their cushion was made with the scraps from their quilt.


Bryan and Catherine snuggling under their quilt Christmas morning and with the Owl cushion.


You can see another quilt I made a few years ago beside them on the rocker called Cardinal Red.

I told them I wanted these quilts to be used so was glad to receive this picture from Ainsley with her and Quincy titled "Quilt wearing-in in progress".


I think this blog post has gone on long enough so will say goodbye until next year!

Monday 30 December 2019

Peppermint Twist Table Runners and Coasters with Baskets

I used a tutorial by Twiggy & Opal called Peppermint Twist Table Runner to make two table runners, one for my sister and one to keep.  Here is mine pieced.  I love all the different red and white fabrics and the white fabric was printed with tiny white snowflakes.


And here it is quilted and bound.  I was very brave and quilted it free motion with white thread in all kinds of swirls in and between the candy and then matchstick quilting in the borders.  I originally left the red solid border plain but felt it needed something after, so I used red thread and quilted a straight line 1/4" in from each edge.


I even like how it looks from the back.  My sister's had different backing fabric and a binding pieced from all of the red fabrics.


The bonus Coasters pattern turned out quite large, more mug rug size.  The one on the right was made following the tutorial and the one on the left was the size I ended up making.  To make them even easier, I folded the backing over to bind them.


I also created a basket to hold the coasters and made three sets.  One set I gave to my MIL to be and one I gave to my cousin Pam and one I kept for myself.


Here's a picture of mine which also shows a quilt I made several years ago although it is partially hidden behind light fixtures..  You can find more details on this Scandinavian inspired quilt here.


Here's my sister's on her Christmas dinner table.


I had fun making all the cute candy blocks and would make this pattern again.

Wednesday 25 December 2019

Merry Christmas!


I didn't mean to be away from the
blog for this long, but everything I was
sewing since mid November was for
Christmas presents and I didn't want
to give all the secrets away..... 


Here's a little taste.


Details to follow.

Monday 18 November 2019

Update on Bryan and Catherine's Wedding Quilt

I have been doing a lot of sewing, 1,300 seams to be exact.  I sewed 128 triplets, 64 beginning and ending with teal/turquoise fabric and 64 beginning and ending with peachy fabric.


Then I sewed the remaining 512 pairs into 256 quads.


And then the 256 quads into 128 octets(?).  Here are the triplets and octets waiting to be sewn into elevenses(?).


And here are the final 128 fans, 64 starting and ending with teal/turquoise and 64 starting and ending with peachy fabric.  (Actually, there are 65 of each, one extra in case of a sewing emergency.)


The fabrics are a little brighter and more colourful combined together than I had imagined.  Here are some of the fans laid out with their matching triangle ends on top of the background fabric.


I like it, but I think I will have to check if Bryan and Catherine like where this quilt is headed before I continue.....

Tuesday 5 November 2019

Bryan and Catherine's Wedding Quilt

I have started making a Pickle Dish Quilt using Sew Kind of Wonderful's Chic Kisses pattern for my son Bryan and his fiance Catherine's wedding next July.  This is the first time that I will be making a quilt using a complete fabric line.  I bought a half yard bundle of Little Bee fabric by Lily and Loom when it was on sale without a specific project in mind and not long after that they announced their engagement.  I had to do quite a bit of figuring out how I was going to use the fabric with the pattern so that everything would work out.  (Possibly why you usually decide what pattern you are going to make and then buy the fabric.....)  I worked out that I would use the six peachy fabrics and the six turquoise/teal fabrics to make the wedges for the pickle dishes and I would use the four chartreuse fabrics and the four primrose fabrics for the triangular ends of the wedges.


I was able to squeak 107 to 110 wedges out of each half yard of fabric which left me about 60 wedges short of each colour but luckily I had also purchased an extra yard of the darkest peach fabric for binding and quite a few yards of the darkest teal fabric for backing so I was able to cut the remaining wedges from these fabrics.  When I say "squeak" I really mean it.  Here is all that was left of a half yard after 110 wedges were cut:  the selvedges and a few slivers off of the first and last wedges which were discarded and a 3" square remnant of fabric.


Here are all the 1408 wedges cut (plus a few extra just to be sure).  The wedges will be sewn together in groups of 11 to make the pickle dish arcs.  I  need 128 arcs for the quilt so I saved out 128 wedges and know that I can pair up the remaining wedges and sew them together into at lest 645 pairs.


Here are my first 100 or so pairs sewn up, 545 to go.....


And here are 645 plus pairs all sewn up and needing to be snipped apart.


When they were all snipped, I only discovered one pair which had been sewn together with the wrong colour on top.  A quick rip and a resew fixed that.


Now the next step is to sew each of the 128 saved single wedges to a pair to make 128 triplets.  I will then sew together the remaining pairs of wedges into groups of four and then into groups of eight and the final step of making the arcs will be to sew a group of eight and a triplet together into 128 groups of eleven.  In theory I should then have 64 arcs beginning and ending in turquoise fabric and 64 arcs beginning and ending in peach fabric.

Friday 1 November 2019

Review October's Priorities and Set November's Priorities

Review of October's Priorities

1.  Finish the label for Ainsley and Jack's wedding quilt and make a hanging sleeve for the quilt as well.  Ainsley has just recently decided she would like to hang the quilt in their bedroom rather than risk the kitties damaging it.

Not Done.  I have no reasons and no excuses that I did not work on this.....


2.  These items have a deadline of 17 October, our next guild meeting:
  • Finish 2 to 3 more pillow cases for Ryan's Case for Smiles
  • Quilt a comfort quilt
Done.  I finished and handed in two more pillow cases and one comfort quilt and since then I have actually finished and quilted a second comfort quilt.


3.  Quilt one of my own quilts for a Christmas present.

Done.  I actually was able to get two of my Christmas Present Quilts quilted. Yeah!


4.  Continue working on my Dear Jane ongoing quilt project.

Done.  I have sewn 9 blocks and 2 triangles since my last Dear Jane post so will be getting a Dear Jane post ready shortly. 

5.  Cut all the fabric for my son Bryan and fiance Catherine's Wedding Quilt to be finished for 18 July 2020.

Partly Done.  I have all the triangles cut and almost half the wedges cut (656 of 1402) so progressing well.


November's Priorities

1.  Finish the label for Ainsley and Jack's wedding quilt and make a hanging sleeve as well.

2.  Continue working on my son Bryan and fiance Catherine's wedding quilt to be finished for 18 July 2020.

3.  Continue working on my Dear Jane ongoing quilt project.

4.  Quilt at least one quilt.

Tuesday 29 October 2019

I Didn't Mean To Finish the Checker Board Rails Quilt So Quickly!

On Monday I got the Checker Board Rails leader and ender quilt on the frame.  Just before I started quilting, I noticed something not quite right with one of the checker board rails but it is going to have to stay that way!


I quilted a row of X's and O's and I meant to leave it at that and quilt a row here and there over the next few days but before you know it I only had three rows left to quilt.


On Tuesday, since I was so close to finishing, I had to quilt the last three rows.  Here's the front all quilted.


And the back.


And since the binding was already made and waiting I went ahead and bound the quilt too.  The lighting wasn't great outdoors, but here's a picture of the finished quilt back


and front.  I really like the checkered binding!


I'm going to get this quilt in the wash and then get a final picture of this quilt and the two Christmas Present Quilts in good lighting and after "crinkage" (crinkling due to quilting and shrinkage due to washing).

Sunday 27 October 2019

Two Christmas Present Quilts Finished

On Thursday I finished quilting the second half of the first Present Quilt.  Here's a picture of the wonderful texture of the quilting on the backing fleece.


I decided to go ahead and self bind the quilt by rolling the fleece backing around to the front.  First I had to miter the excess fabric off the corners.  The binding went really well and looks great.


On Friday I got the second present quilt on the frame and quilted the whole thing.  I didn't get any sewing done on Saturday, but on Sunday I self bound the second quilt too.  Here they both are hanging on the line.  I just love the texture of the quilting on the fleece backing.


Just because I like it so much, here's a closeup of the backing texture.


Here are the quilts from the front.


And blowing in the breeze.


Here's a close up of one of the quilt blocks and a bound edge.


I only had a little bit of thread left from two 250 metre spools of thread which was used in the bobbins only which means I used almost a kilometre of thread quilting and binding these two quilts!


I had so much fun quilting these two quilts that I pieced together some backing fabric so I can go ahead and start quilting the  Checker Board Rails Quilt next.

Wednesday 23 October 2019

Quilting the Present Quilts

I started making one of these quilts in December of 2018 and had two different present quilts sewn together into completed tops by March of 2019.  You can see previous blog posts by clicking on this link.  I have been wanting to try fleece as a quilt backing for awhile and since these two quilts are both lap size I thought a nice cozy fleece backing would be a good fit.  As a bonus, I can use the same colour fleece for both quilts so only have to load the backing fabric on the frame once.  We are cat sitting for my daughter so one of her cats, Quincy, was "snoopervising" as I loaded the fleece on my frame.


I decided to use a pantograph called leaf and berry by Golden Threads.


I used green thread in the bobbin to match the fleece backing and off white thread on the top because the background of the top is off white.  Here is what the quilting looks like both on the top of the quilt and on the rolled up fleece backing. 


I'm half way through quilting the first quilt and I'm loving how the quilting is giving the fleece an embossed look.  At the fabric store they suggested rolling the fleece to the front for binding.  I will have to see if I like the look of that or not....