Showing posts with label Cushion. Show all posts

Thursday, 31 December 2020

Snowflake Cushions

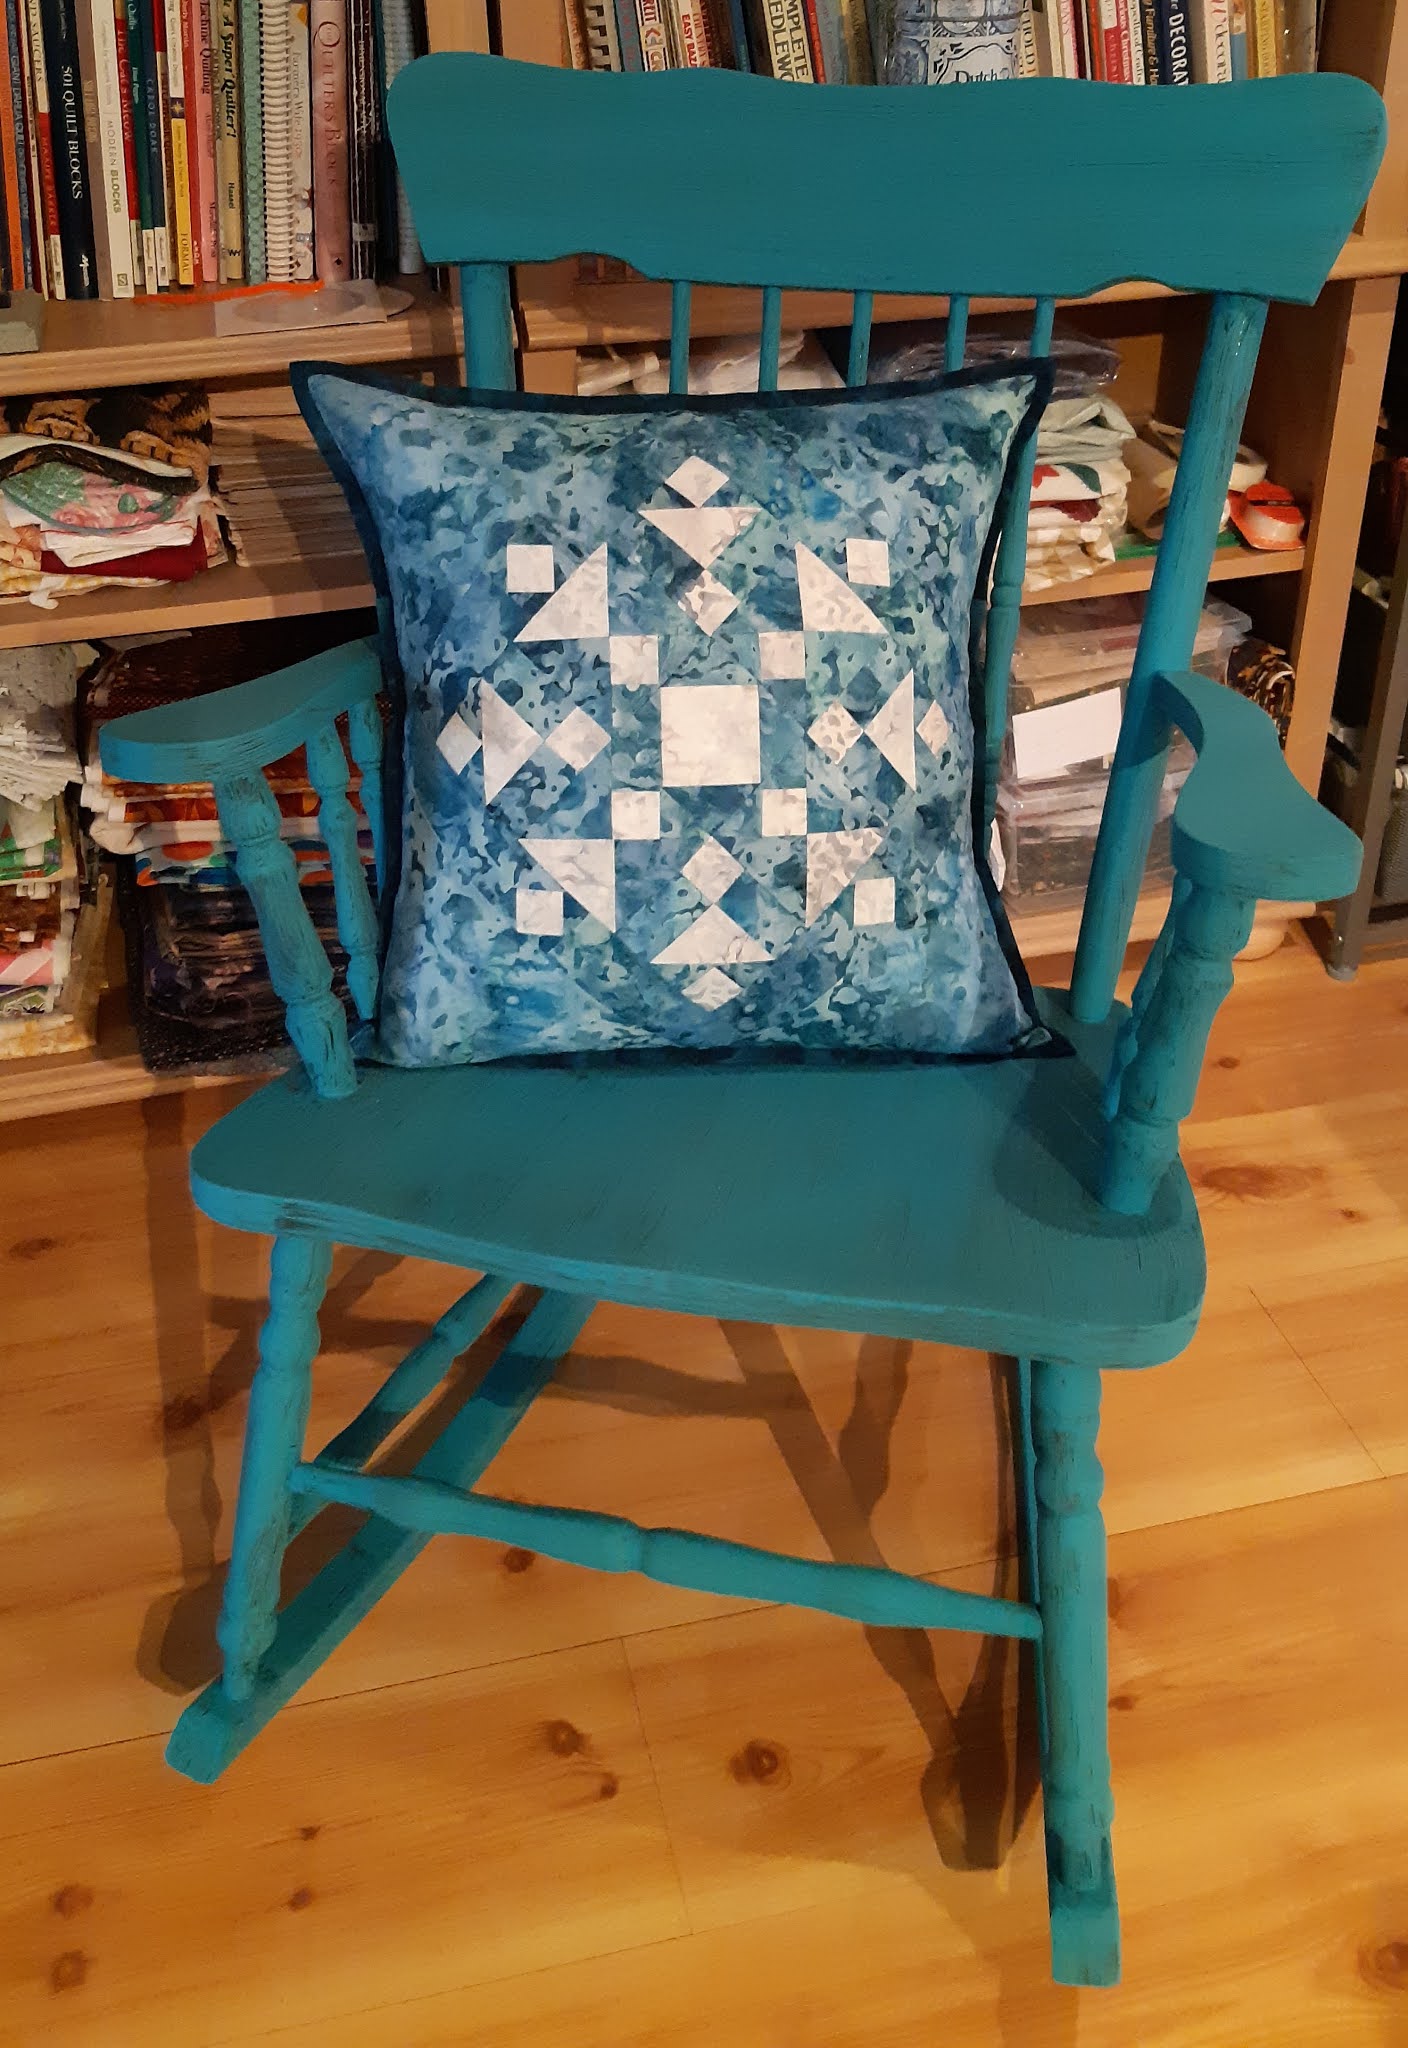
I found this beautiful free Snowflake pattern from Kathy Schwartz, a Canadian who blogs at Tamarack Shack and is half the design team behind Highway 10 Designs.  Snazzy Snowflake was originally designed in celebration of Canada's 150th birthday.  I had three pieces of batik fabric which I thought would look great as snowflakes.  I made the snowflake block in the light and medium fabrics and put it on point by adding four triangles to the sides to make it big enough for a cushion.  I used the dark fabric for the back and binding.

I only had a limited amount of fabric since I was working from stash so I made the envelope backing a half inch larger on all sides so I could use it to self bind the cushions.  I sewed the binding down and then sewed another row of stitching in the binding ditch to make the seam stronger since this was the only seam holding the whole thing together.  I didn't quilt the snowflakes.

Here's a picture of one cushion in a rocking chair I am painting teal.  I only have one coat of paint on it so far so you can still see the black paint through it.


While I was making these cushions I was wishing that the contrast between the snowflake fabric and the background fabric was more crisp so the snowflake design was more clear, or maybe it is just because of the mottled prints, but I began thinking of them as snowflakes in a snowstorm!  I gave two to my sister and one to my d-i-l's mother for Christmas.

Tuesday, 3 March 2020

3D Pinwheel Cushion

I made this cushion cover after watching this Missouri Star Quilt Co. tutorial.  I wanted eight colours, so I picked the seven colours of the rainbow plus pink and chose a neutral grey background fabric.


I pressed all the coloured pieces into pinwheel shapes.


And then placed the pinwheel shapes on four grey fabric squares.


I sewed them into pairs and then into four patches.


And then added a grey rectangle to one side of all the pinwheel four patches.


I arranged the pinwheels in the order I wanted them.  The NSEW pinwheels were arranged so the pinwheel was closest to the outer edge.  The corner pinwheels were arranged so they were closest to the centre and another grey rectangle was added to fill out the corner square.


The final sewing step was to join these nine pieces together into one piece.


The next step is to layer the cushion top and quilt it.  It is 20 3/4" square.  Once it's quilted, I'll make an envelope back and bind the edge.  I don't have enough of the grey fabric left for the back, but I could use what's left for the binding.  I really like how the pinwheels are such a bright contrast to the grey background and they pop, not just in brightness, but 3D as well.

Tuesday, 31 December 2019

Merry and Bright Cushions and Present Quilts

I had been wanting to make one of these cushions for a few years having seen several made by different people whose blogs I read.  I did a bit of embroidery this summer so felt I was now up to the task!  The pattern is by Amy Sinibaldi of Nana Company and can be found here.  I had so much fun making the first one that I made a second one too.  Since I gave them both away, I can see a third one in my future to keep!

Here is the first one.  I was working with 1.5" left over Christmas fabric scraps so luckily sewing 4 of them together gave me the required 2" finished squares the pattern called for.  The white fabric has tone on tone white snowflakes.


And here it is embroidered.


 Here is a close up of the fabric I used to make an envelope style back and how nicely the glue basted binding corner turned out.  I washed it once it was finished to remove all traces of the washable school glue.


Here's a picture with the nicely stuffed cushion and a bit of the Christmas tree showing in the background.  I should have turned the tree lights on.....


If you go to my very first blog post of 16 January 2017, you can see some Christmas items I made using owl fabric for my son and his fiance.  I still had a bit of that fabric left so decided to make a second cushion since the strip of owls fit the dimensions of the cushion pattern perfectly.  Here it is pieced.


And embroidered and bound.


Here's the envelope backing.


I was able to use the same binding fabric and embroidery thread on both cushions and they matched each cushion perfectly!  Here's the finished owl cushion.


The first cushion went to my daughter and her husband and of course the second went to my son and his fiance.  This is definitely a make again project and the embroidered wording could be changed to anything you want!

The two Christmas Present quilts I made were also given to my children and their partners. 

Ainsley and Jack opening their quilt Christmas morning.  Their cushion was made with the scraps from their quilt.


Bryan and Catherine snuggling under their quilt Christmas morning and with the Owl cushion.


You can see another quilt I made a few years ago beside them on the rocker called Cardinal Red.

I told them I wanted these quilts to be used so was glad to receive this picture from Ainsley with her and Quincy titled "Quilt wearing-in in progress".


I think this blog post has gone on long enough so will say goodbye until next year!

Thursday, 14 February 2019

Finished Tree of Life Cushion Cover and Progress on Cat Applique Sewing Machine Cover

Yesterday was a snow day so I was able to skype sew with my sewing buddy Marilyn during the work week.  I worked on fusing the applique cat which will become the front of my sewing machine cover.


Here he is with just a few quilting lines drawn on him in white chalk, but it brings him to life.  I can already tell he is mischievious and is going to cause some mayhem in the sewing room.  Whenever I can't find anything, I'll be able to blame it on him!


Today I quilted and bound the Tree of Life Cushion Cover.  Here's what the quilting looked like from the back.  I did some orange peel quilting in the branches of the trees.  I think they look like leaves.


Here's the envelope back and binding.


And here's the front.


I will have to get another cushion form so I can use it and take another picture with it stuffed.

Friday, 8 February 2019

Friday Finishes (3) and Starts (2)

Yesterday I finished the Heart Lattice cushion cover.  It turned out fine for something I made off the top of my head.  I quilted it on the diagonal down the centre of each lattice but it didn't seem like enough so I quilted it again on each side of the diagonal lattices which made this nice pattern on the backing fabric.  I was using up some old polished cotton since it will never be seen.


I bound it with the same fabric as the  background.  Here's the finished front.


And here's a picture of it in a chair from the front and also a shot of the envelope back. 

It was a really dull day so the pictures are kind of dull too unfortunately.


Here's the Bug Comfort quilt all quilted and bound with turquoise leaf fabric and all washed and shrunk up nice and snugly. 

The Bug Mug Rug turned out pretty cut too.


And here are the flannel backs.


Here's a close up of the quilting on the quilt.  I quilted loops all over it like the bugs and butterflies crawling and flying everywhere.  And look, the butterflies on the backing flannel have loopy trails too.


I was happy that I was able to capture "Live Life Green" and the frog on the back of the Bug Mug Rug.


And just because it's so yummy, here's another shot of the texture in the quilt.


Since I was on a roll, I sewed some more bits and pieces of left over flannel together so I have a backing ready for the next quilt.


And speaking of next quilts.....  Today I kept seeing Tree of Life blocks as I was reading my favourite blogs and my friend Marilyn is making a Tree of Life Quilt, so I decided I need a Tree of Life block too.


It finished at 23".  I think I will trim it down to 20" and make another cushion cover.

Wednesday, 6 February 2019

Several Productive Days!

From Thursday, when my Dear Jane Group met, until yesterday morning, I have pieced five more Dear Jane blocks, but they deserve their own post.

Yesterday I got out two Valentine's Day themed table runners and decided I also need a Valentine's Day Cushion cover.  You can see  the heart table runner here and the X & O table runner here.  After playing with graph paper and a lot of cutting and sewing (157 pieces to be exact) I ended up with this 19.5" cushion cover which I should be able to get quilted and made into a cushion cover this week.


On the weekend, I was digging through my "kid" prints looking for suitable I-Spy fabrics to make sample blocks for an I Spy Jar quilt our guild is going to make.  I came across 22 disappearing nine patch blocks that were left over from making a baby quilt as well as a few left over scraps.  I decided there was enough fabric to make the minimum size premie quilt for our local hospital.  Last night while I was skype sewing with my friend Marilyn, I got the pieces put together.  It ended up 23.5" x 25.75" and I was able to put the last two blocks together to make a little mug-rug.  I had also pulled out three strips of different bug fabric and decided I could make an I-Spy Jar block.  A full post on the I-Spy Jar blocks is also in the works so this is just a sneak peak.


This morning I got some left over flannel fabric pieced.  It made me happy that these fabrics have bugs and butterflies on them so they go with the top fabric.


I also got the mug rug quilted and fabric for binding picked out.


Isn't the bug mug rug cute!

Tuesday, 14 November 2017

Canada 150 Quilt & More Canada Flag Cushions

As previously mentioned, I am a member of the Mayflower Quilters' Guild.  This year I volunteered to be co-chair of Program. Last spring our guild requested members to make blocks related to Canada 150 for a quilt to donate to Camp Hill Veterans Hospital in Halifax.  The blocks were put together by the person who I replaced so it was then my turn to quilt and bind the quilt.  Here it is:


I quilted it with a pantograph from Apricot Moon Designs called Maple Sugar and bound it with a red and white striped fabric.  Here is a close up which shows some of the maple leaf pantograph and the binding:


As mentioned in my previous blog, I am trying to clear up some odds and ends of projects to make way for Christmas sewing.  I had previously blogged about a cushion I made for Canada Day.  I had actually started a few more of them but just hadn't gotten the backs put on or the pillow forms made.  I got them finished this past weekend. The original one (http://allikatquilts.blogspot.ca/2017/07/150th-anniversary-canada-day-pillow.html) went to my husband's cousin's family because they hosted a family reunion which we attended on the July 1st long weekend.  I gave one to my father and will keep another one.  Here's several of them together:


And here is the quilt with a couple of the pillows, just because:


I really like that red plaid flannel - it is just so cosy!

Wednesday, 1 November 2017

Fall Maple Leaf Cushion Cover

I really like the fall colours.  I have made more fall coloured quilts, wall hangings and table runners than for any other season, but I don't have any fall cushion covers.  I also just visited the newly opened Ikea in our area and discovered feather 20" x 20" cushion innards for $8 and polyester 20" x 20" cushion innards for $5.  The local quilt store sells the polyester ones for $13, so I have found my new source for cushion forms...

I used a free Autumn Leaf Quilt Block tutorial and pattern from Generations Quilt Patterns:
https://www.generations-quilt-patterns.com/autumn-leaf-quilt-block.html
I used the 5" pattern, there are are also 10" and 15" patterns.

I made nine maple leaves and put them together with 1.5" sashing and corner stones.  Here it is before quilting:


I quilted it on my sewing machine using my walking foot by ditch stitching all the sashing and then quilting 1/4" inside each maple leaf:


I made the cushion back with a flap to cover the zipper for the first time.  It is was very easy. The only thing I would do differently is make sure my bobbin thread was the right colour before I sewed the flap down...  I then bound the cushion just like a quilt with the same fabric as the backing.


Thanks to my friend Marilyn for the backing fabric.  There was an auction while we were at the Pictou Retreat and Marilyn bid on a bundle of mostly neutral fabrics and got it.  She gifted me with the brown leaf fabric as it wasn't to her taste.  Thank you Marilyn!

Tuesday, 18 April 2017

Cathedral Windows Cushion Cover

A Cathedral Windows Quilt is on my bucket list, but not one made by hand, I want to make it by machine.  I have seen a few tutorials which have been adapted to make by machine, however they all still use the method of folding the material up in layers and layers like the paper games we made as kids where you choose your favourite colour etc, to reveal the answer.  I stumbled across a tutorial on the Missouri Quilt Company website where Jenny shows how to make it by machine using squares folded into triangles.

Here is the link:  http://blog.missouriquiltco.com/cathedral-window-tutorial/

All you need to decide is what size squares you want to use and cut everything that size.  I decided to make a cushion cover as a test and picked 3" squares.  I made the backing and chose my focus fabrics.


Then I pinned the focus fabrics in place.


Then I added almost ever pin I owned in order to pin down all the curves.


It was like sewing a porcupine I had so many pins in it, but I got it done.  Then I added piping and a lapped cushion back.  It was really easy.  I had more trouble with the piping than sewing down the curves.


I can easily see myself making a full size quilt with this method, likely using 6" squares.  I am going to a quilt retreat in September and may have just found my retreat project!