Sunday, 28 February 2021

Sewcialites Block 20, Jelly Snowflake #5 and Mayflower Mystery Quilt # 1, Part 2 Step 3

 Last Friday, 19 February, the Sewcialites Block didn't get published as planned due to the weather and electrical problems being experienced in Texas so it came out this Friday instead and the quilt along will run a week longer.  Hopefully everyone who was affected is now getting back to normal.  Here's my block 20, Honor, or as spelled in Canada, Honour.

Here are blocks 19 and 20 together and blocks 1 to 18 together.


I also started working on another flannel Jelly Snowflake quilt, the fifth and final one.  Here are my four corner blocks.


While I was sewing the Sewcialites block and the Jelly Snowflakes blocks, I worked on putting two units of the Mayflower Mystery Quilt together and now I'm ready to sew two sets of units together.  One done, 83 to go.

Moving three separate projects forward in one day feels great!

Saturday, 27 February 2021

Mayflower Mystery Quilt #1 Part 2

While I was sewing the blocks together to make the Bee-utiful Baby Quilt, I also started to sew together the units made in Part 1 following the instructions in Step 1 of Part 2.  I put the pieces in a little basket beside my machine and every time I sewed a seam on the baby quilt, I would sew a couple of the Mystery Quilt parts together.

By the time I had the baby quilt in one piece, I also had all 84 units of the mystery quilt sewn together and pressed open.  I also organized the units for Part 2 Step 2 the same way so I can easily continue on this project the next time I'm in the sewing room.


Two projects moving forward is twice the fun!

Friday, 26 February 2021

A Bee-utiful Baby Quilt

Sorry, I couldn't help myself.  My niece Elizabeth and her partner Noam are expecting a baby in April and after asking several questions I ended up selecting the following fabric.  The fabric is much brighter in person, but look at all those cute bees and text prints!

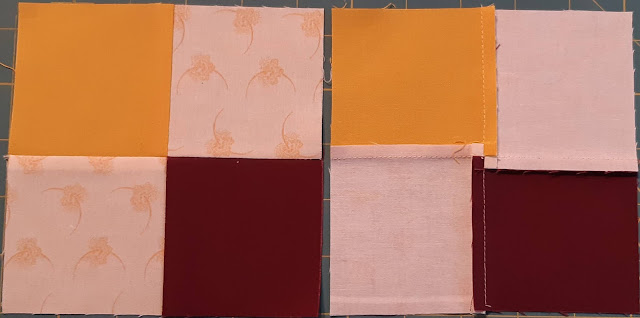
The pictures Elizabeth sent me to give me an idea of the colours and the types of quilts she liked were very simple patterns of squares and rectangles which led me to make the following two blocks.

I was just going to alternate these blocks in a zigzag manner, but then Margaret B-M from my guild happened to send an e-mail about some free quilt patterns by Tone Finnanger of Tilda's World and I had to make the bees.  The quilt blocks above finish at 6" square and the bee blocks were to finish at 12" by 13" so I only had to minimally adjust the pattern!

I sewed black ribbon stripes on the bees and I will either quilt or embroider black antennas and add button eyes to the bees as well.  I have had the blocks laid out on my design wall for a few weeks and haven't felt the need to rearrange anything so....

I sewed the blocks together and stay stitched around the edges and the top is now ready to quilt.


I even know what pantograph I'm going to quilt.  It's not bees, but it will still tie in very well with both the fabric and baby theme.

Thursday, 25 February 2021

Lots O' Luck Table Runner

On Tuesday I watched a new Missouri Quilt Star Company Video on how to make a Lots O' Luck Table Runner and I had to make it.  Here's my first block.

They made three blocks, but I only had enough left over bits of fabric to make two blocks.


I also found a gingham fabric in my stash that is perfect for the backing and binding.  There is a textured daisy printed on the fabric which I will use for the backing, but I am going to use the back side of the fabric for the binding.  You can see the top side of the fabric on the left and the back side of the fabric on the right in the picture below.


I even have two folded triangle corners ready to add in case I want to use it as a wall hanging instead of a runner.  I will also write on these corners as my label.  


Now, I just have to decide how to quilt it.

Wednesday, 24 February 2021

Mayflower Mystery Quilt Along #1, Part 1 Completed Using A New-To-Me Masking Tape Ledge Trimming Technique

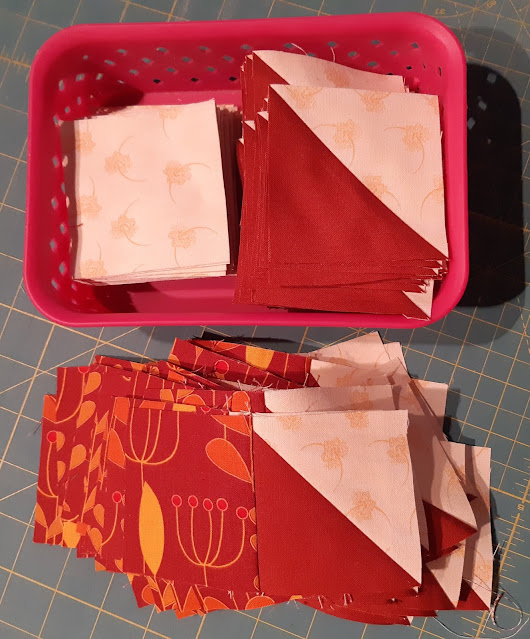
The Clue for Part 2 came out today which reminded me to blog about completing Part 1 which I did several days ago.  There were a bazillion hst's which were sewn oversize so needed to be trimmed down.  I had trimmed a few just using a plain ruler and it was slow going.


At just the right time, Jane M. forwarded me an e-mail from Denise O. of our quilt guild requesting that I highlight Canadian quilter Karen Brown in our next guild newsletter if I had not highlighted her before.  I had not so immediately went to check her out and found tons of video tutorials which I have been binge watching ever since.  You can find out everything about her at Just Get It Done Quilts.  I have probably watched a dozen of her videos now and have learned something from each one.  This is were I learned about Masking Tape Ledges for trimming hst's in hack number two of Karen Brown's 5 Sewing Hacks with Masking Tape video.  Please go watch it, I'll wait....

Here I have a masking tape ledge made up of 4 strips on the back of my ruler butted up against my pressed to the dark side seam and the excess dark edges trimmed off.


I chose to use a ruler which had diagonal lines on it so it made the masking tape placement very easy.  However, since my ruler wasn't square I couldn't slide the ruler as described by Karen to trim the light side of my hst's but I figured out a work-around.  I trimmed all the dark sides and then moved the masking tape ledge to the other side of the line and then trimmed all the light sides of the hst's.


It was so quick and accurate I trimmed all 168 blocks at once.  Another bonus with the masking tape is that the texture of the tape grips your fabric so your ruler slides less which means you don't have to press on the ruler as hard to keep in it position.  So here are all my trimmed hst's and my four-patches from Part 1.


I have Part 2 printed so I can start working on it and you can bet I will be using the masking tape ledge trick again.  Thanks to Denise O. for bringing Karen Brown to my attention and thanks Karen for everything I'm going to learn from you to improve my sewing.  I have already subscribed to Karen's YouTube videos and signed up for her Newsletter and added her to My Blogs I Love to Read List.

Wednesday, 17 February 2021

Mayflower Mystery Quilt #1

The second half of Part 1 of the Mayflower Mystery Quilt #1 was to make hst's.  They were oversized and then you trimmed them down to 3".


 I haven't finished making all of them yet but they are all cut and ready beside my machine so I can work on them as I'm sewing other things.

Tuesday, 16 February 2021

Sewcialites Block 19

 Last Friday's Sewcialites Quilt Along Block was a little more challenging with the square in a square centre, but I think my points matched up not badly.  Here's my block 19 Unity.

And here are my previous 18 blocks.

This is one of the few fabrics in this collection that is tone on tone.  It's very pink.

Tuesday, 9 February 2021

Mayflower Mystery Quilt Along #1

The Mayflower Quilters Guild which I belong to is doing two Mystery Quilt Alongs.  I was able to find enough fabric in my stash to do the first quilt along.  Here's the fabric I'm going to use.


I bought fabric A+B just because I really liked it so I am pleased to find a project for it.
Fabrics C, D & F were all bought at the same time to coordinate with another fabric which I am using for a Kaleidoscope quilt.  I couldn't have picked them to match fabric A+B any better than they do!  I will still have enough left over for my Kaleidoscope quilt.
I bought fabric E because I love gold and red fabrics and checkerboards.
I bought fabric G on sale expecting it to be used as a backing but think it will work well here as the background.

Here are the four patches I made as the first half of Part 1 of  the mystery instructions.


I have spun the seams on the back as instructed.  The little four patch at the centre is just so cute!

Monday, 8 February 2021

Sewcialites Block 18

 Block 18 of the Sewcialites Quilt Along came out on Friday.  I got it cut out on the weekend and sewed it together this morning.  Here's my block 18 Hearty.

And all 18 blocks so far.

As I've made more blocks, I've been trying to keep the number of blocks even between the cool blue/green/dark purple fabrics and the warm orange/pink/violet fabrics as I like the cool-warm-cool-warm layout.  This is also the half-way point in the sew along.

Friday, 5 February 2021

Quilts of Valour Canada National Sew Day

Today is a sew day via zoom for Quilts of Valour Canada.  I didn't join the zoom group but I had a small kit of the Stonehenge QOV fabric which I had bought quite awhile ago when a QOV representative spoke at our guild.  The kit was supposed to make one pinwheel block with two fabrics.  However when I opened it up, there were three fabrics included:  a small piece of red text fabric and a small piece of Inukshuk fabric both about 6" x 10" and a larger piece of white and red text fabric about 10" by width of fabric.  I decided not to make the pinwheel block but went to the QOV website and found that one of their recommended blocks was a Friendship Star which would use three fabrics.  To make the most of my fabrics, I made 3" unfinished hst's which gave me an 8" unfinished block which I then bordered on two sides with more of the text print to make them 9 3/4" unfinished so that they could easily be trimmed to the required 9.5" by whoever receives them.  Here's the block I made.

Actually, I was able to make three Friendship Star blocks and with the leftovers I made a block that resembles the Canadian Flag.  Here are the four blocks I was able to make with the kit intended for only one block.

If you look closely at the Canadian flag block, it was an absolute coincidence but the right hand side of the flag includes the word PEACE.  If I get really ambitious, I may embroider the outline of a maple leaf on the flag.


These are all the scraps I had left.

Now I'm off to see if I jave some dark red embroidery floss to embroider a maple leaf.

Wednesday, 3 February 2021

Stitches from the Heart Wall Hanging

I first saw this pattern on Pat Sloan's quilt blog.  The Stitches from the Heart free quilt pattern from Fat Quarter Shop gives instructions for a 12" or a 35" block.  I made the entire thing from leftovers and didn't have enough of the two pink fabrics I used to make 3.5" cut hst's so I used 2.5" cut hst's and ended up with a 24" block.  The background fabric was left over from the backing of a quilt I made for my sister.  Here's my block.

The binding and backing were left overs from fabric I've used in at least three other quilts.  I had to piece the backing with five 5" strips and used the rest to make my binding.  When I finished the binding, I had less than 1" of fabric left, that's cutting it close!  I also pieced my batting from two pieces of left over batting.  Here it is all quilted and bound.

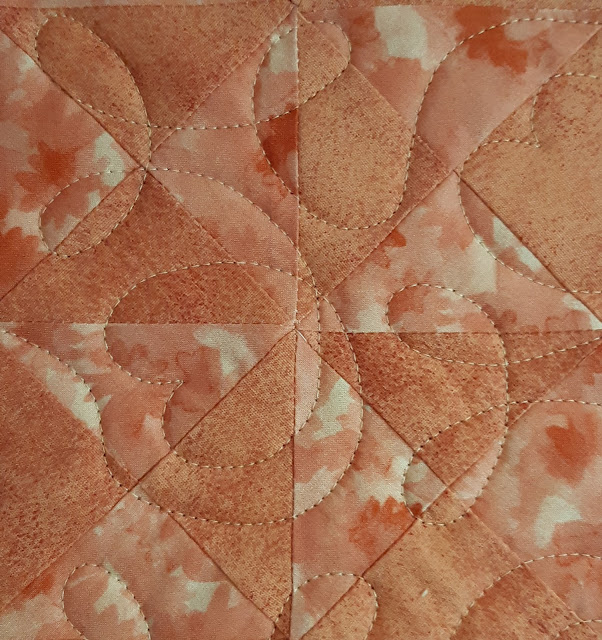
Here's a closeup of the heart and loop quilting which I used before when I made my Nova Scotia Hug quilt so even the quilting was from another project.  I used beige thread to blend in with the background fabric and it blended in quite well with the pink fabrics as well.

I'd like to make this pattern again using 2" cut hst"s in order to end up with an 18" block to make a cushion cover.

Tuesday, 2 February 2021

Mayflower Quilt Guild Block of the Month by Scott Flanagan

Yesterday the second block came out for our guild BOM.  Today we are having snow, ice pellets, rain, wind etc. so it was a perfect sew day!  Here's my second block called Double X.  It only used three of the five colours in the first block.


 And here are blocks one and two together.


I like how each block has a different colour frame.