Monday 23 September 2019

Manx Log Cabin Blocks

And then there were two.


I made the second block much more quickly than the first for two reasons.  The strips were already cut and I didn't stop to iron each strip.  I simply used my creasing tool to mark the 1.5" using my 12.5 square ruler to keep the block square and then rolled each strip flat.

Now I must get back to the sewing I wanted to accomplish for September.

Saturday 21 September 2019

Folded Log Cabin or Manx Log Cabin for National Jelly Roll Day

The other night at quilt guild one of our members was showing some antique quilts made by her grandmothers.  A folded log cabin quilt caught everyone's interest.  I will post a picture of it here once I have her permission.

I went looking for the instructions on how to make a folded log cabin block and found several that used strips of fabric folded in half, but if you lifted the folded edges you would have been able to see the stitching and this particular quilt you could not.  I finally found this wonderful tutorial by Ice Bear Quilts called a Manx Log Cabin.  It calls for jelly roll strips or 2.5" strips of fabric and the folds come out at half an inch.  Doing some math, I believe the antique quilt must have used 1.25" strips which came out at one quarter inch folds!  So if you really wanted to, you could cut your jelly roll strips in half to work in one quarter inch scale.

I won't go into all the details of how it's made as the tutorial is really good and gives the history of the block as well.  I started with foundation fabric which I ironed on the diagonal as instructed but I also drew some pencil lines every inch to help keep me square as I went along.


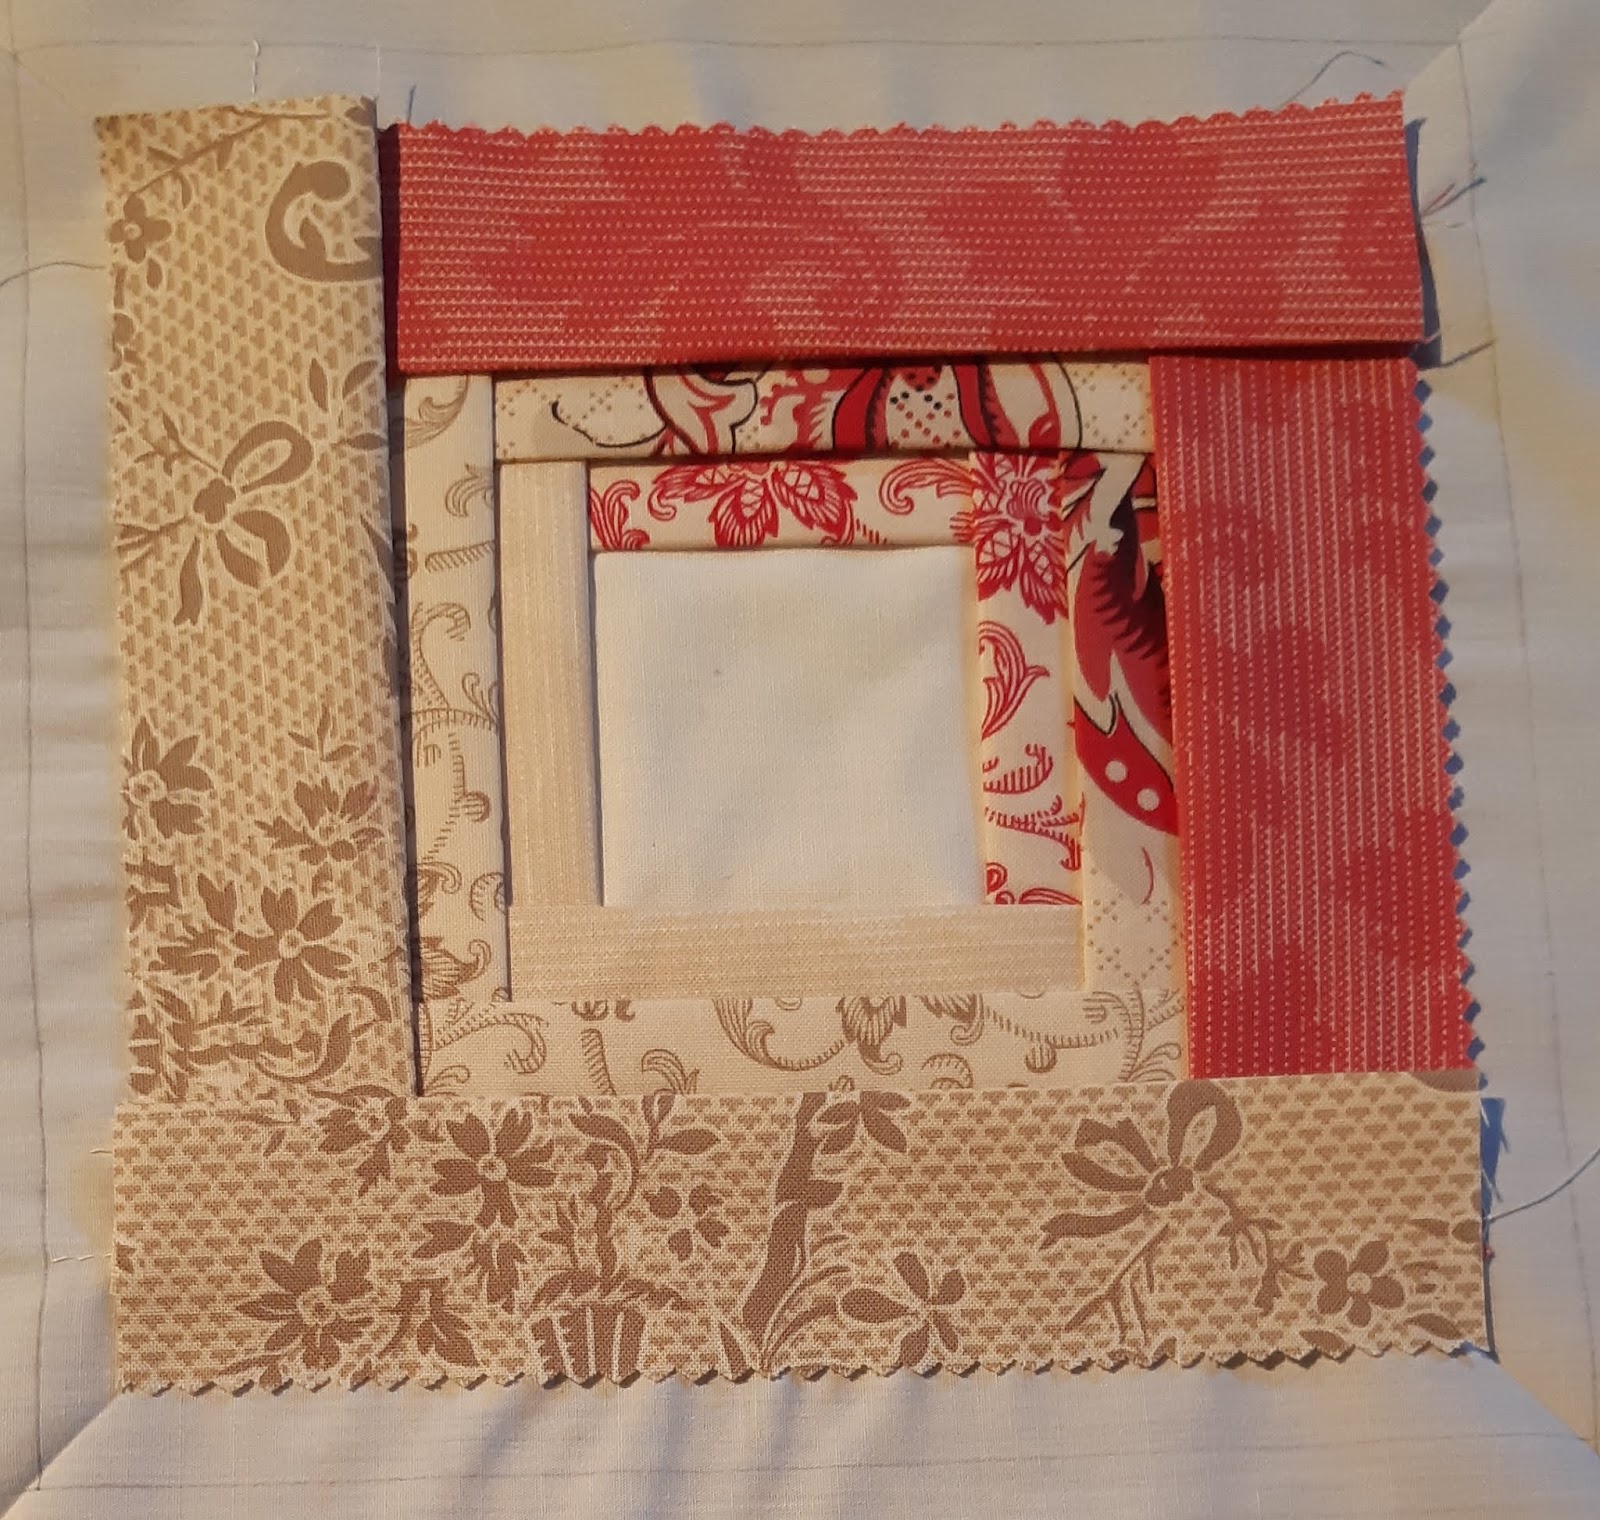
Here is the centre square and the first log added.  I folded the corner back so you can see that there is one inch of fabric including the one quarter inch seam allowance on the back of the fold and one and one-half inches of fabric on the front fold.  If you wanted your fabric to go further, you could probably take a shallower fold and still get the same effect.


Here are two completed rounds.


Here are three completed rounds.


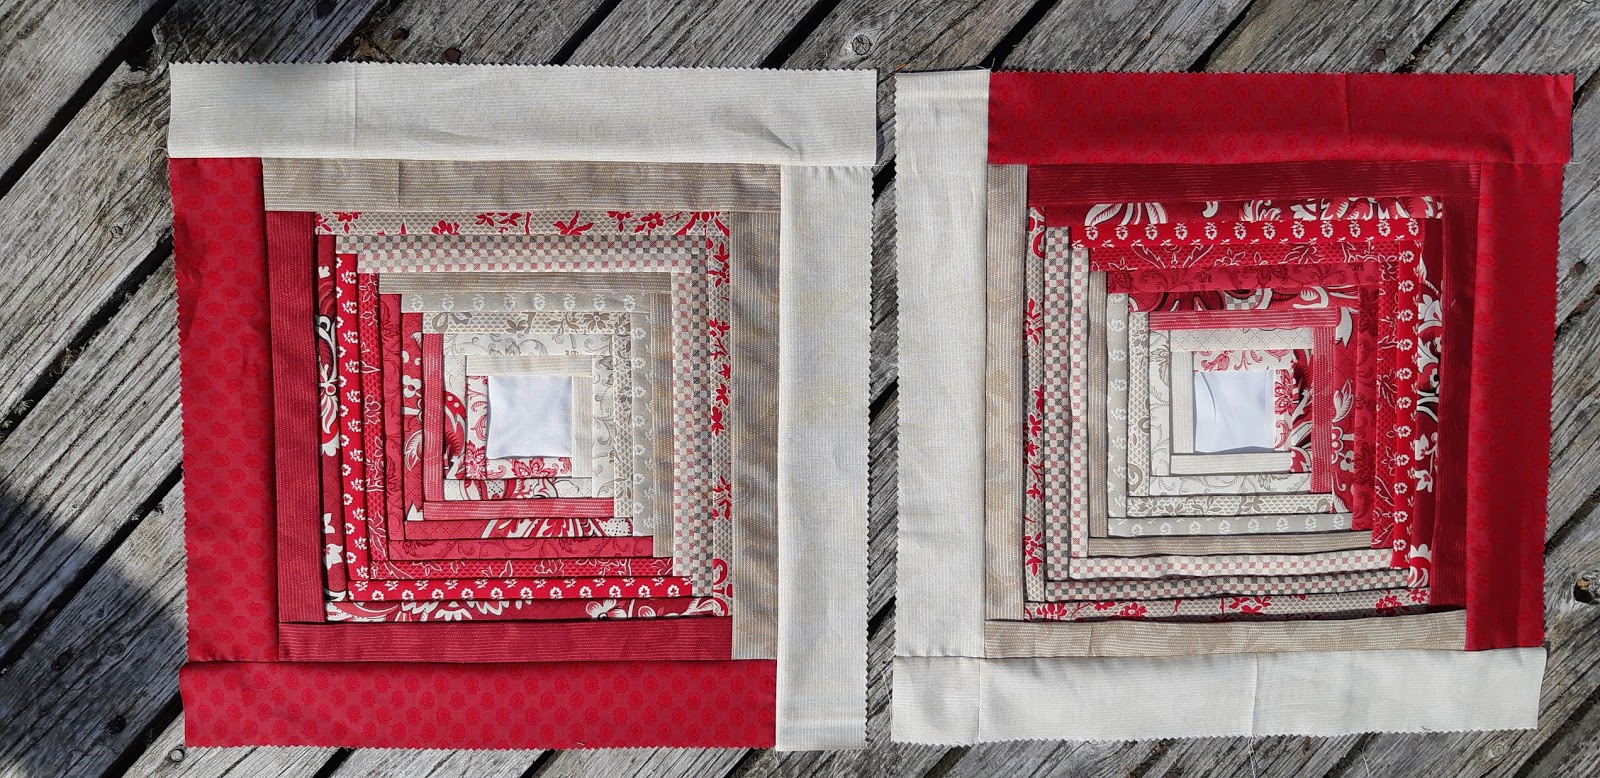
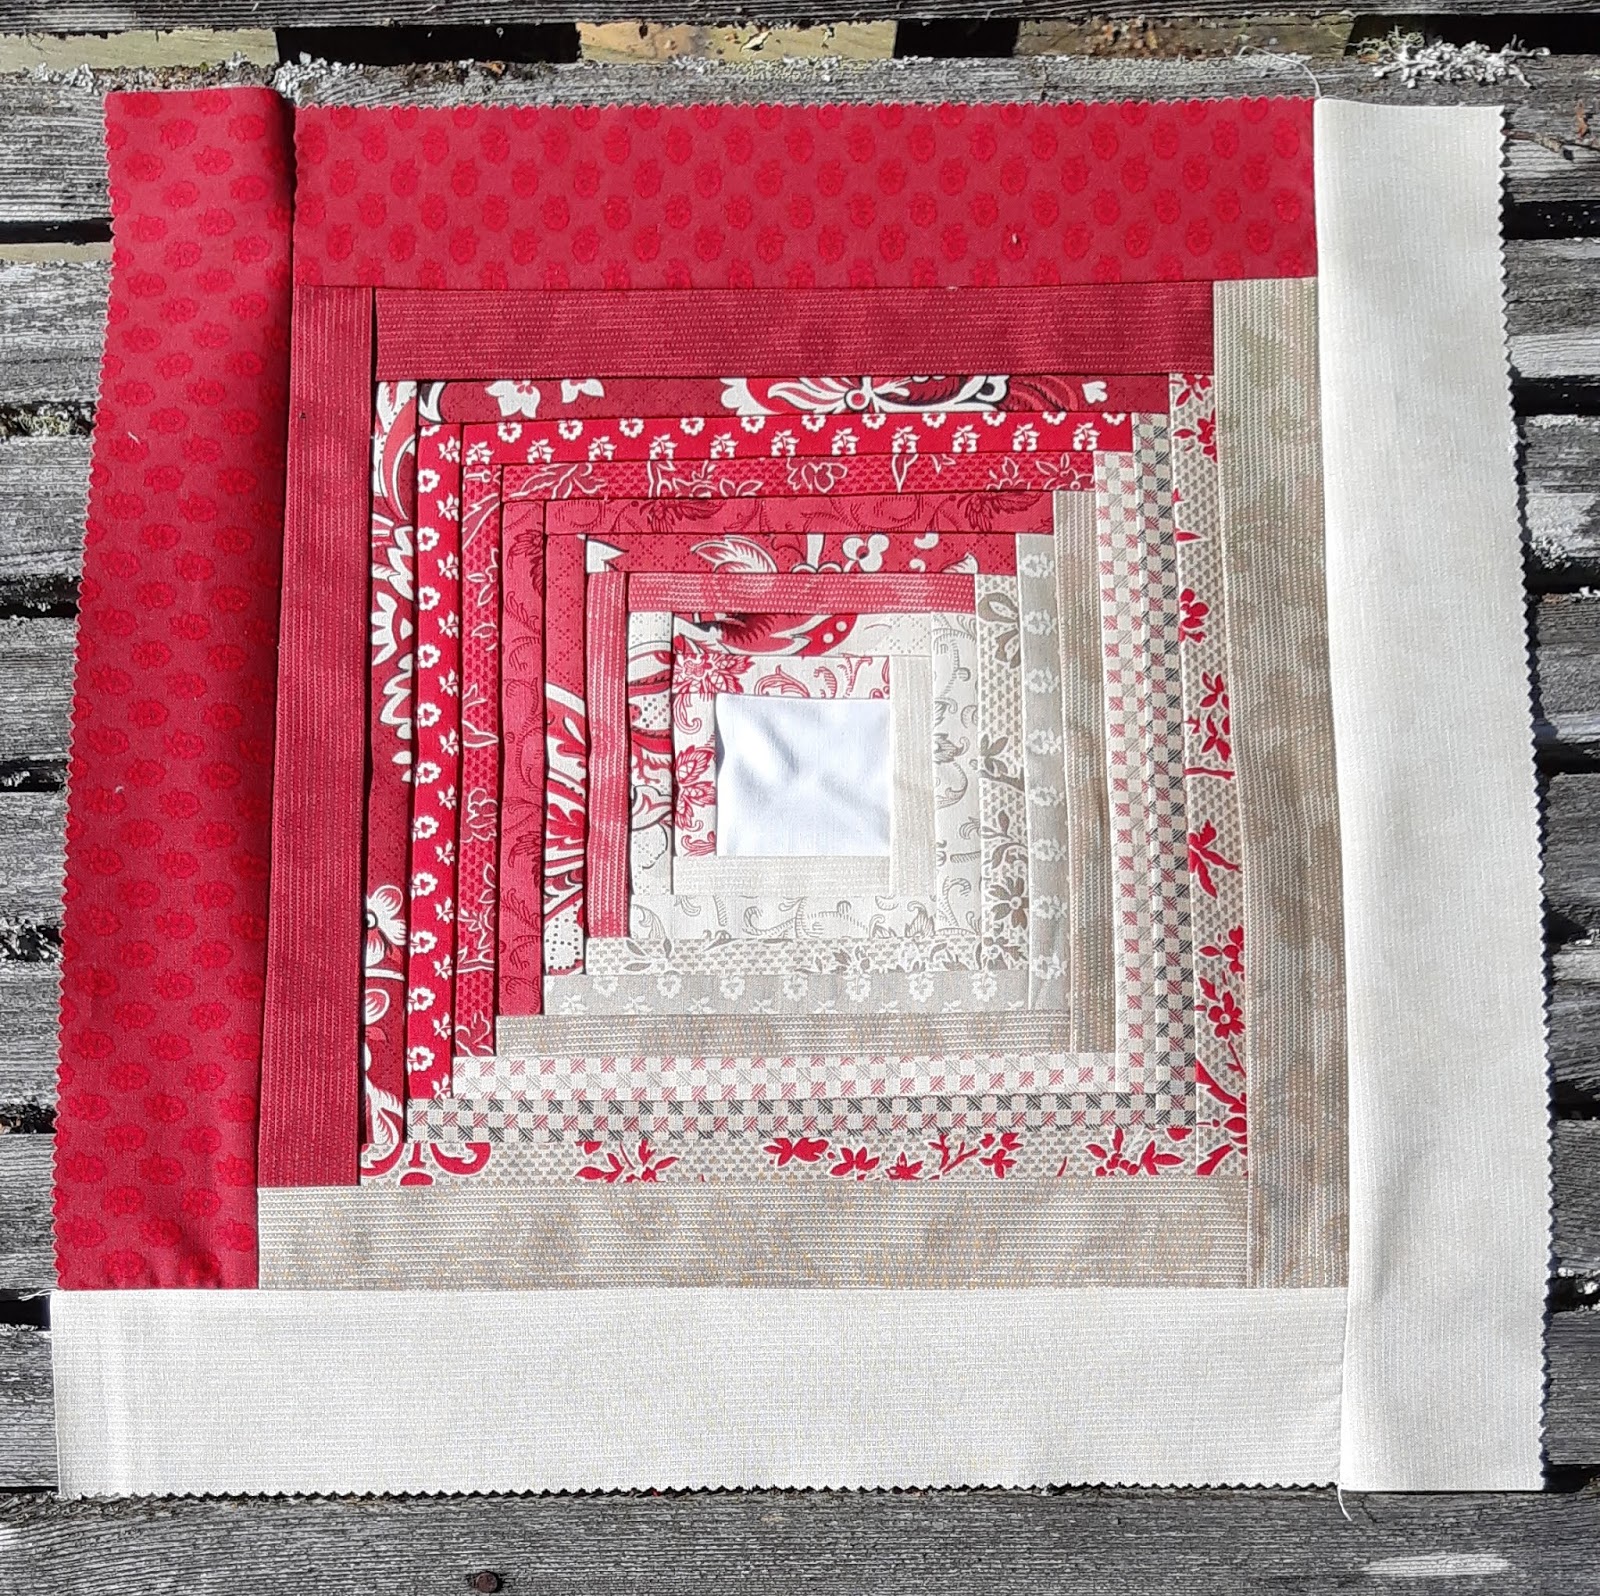
Here are nine completed rounds plus a tenth row attached in the regular log cabin method.  Since the final folded log cabin row does not have another folded row on top of it you can see the full width of it.


I plan on making a pineapple quilt with this fabric and had an extra jelly roll on hand to make some cushions to go with the quilt and decided to try out this technique.  The second cushion top will sew up even more quickly since I cut the strips for it as I worked on this one.

So this was my Jelly Roll sewing for National Jelly Roll Day!

Friday 20 September 2019

Phoebe Bag (Purse)

Our guild had a bag challenge and I have been wanting to make a purse so I made a fairly simple one as my first attempt.  Being me though, I did complicate it a bit by adding a welted zippered pocket to the back of the bag and also by making an adjustable strap.  You can download a free PDF printable pattern for the Phoebe Bag by Rebeka Lambert from the patternpile.com.


First I attached a fussy cut inside patch pocket to the lining.  I added an extra row of stitching 1" from one side of the pocket for a pen pocket.


Then I sewed a welted slot in the back of the bag.


And installed a zippered pocket.  I was going to use a black zipper since the welt was centered in the black stripe, but in the end I couldn't resist the pink zipper.  Next time I will remember to baste the zipper in so that if it's not quite right it is easy to rip out and redo.  I chose to leave it rather than rip it this time.  Even though it is slightly crooked, it zips and unzips no problem.


Here's a completed picture of the bag showing the fussy cut cat on the flap closure and the fussy cut adjustable strap.  I cut the strap out of the black striped area of the fabric for the outer side and the lining on the inner side.  This was the first time I installed a magnetic fastener and it was "easy peasy".


Here's an inside view showing the inside patch pocket.


And here's a back view showing the open zippered pocket.


I am very pleased with how the purse turned out and will definitely use it.  I like the size and will likely make it again.  Next time I may add more inside pockets and a place to attach a key ring.

Linked to Wendy's Quilts and More Peacock Party  

Thursday 19 September 2019

Colourful Pillowcases for the IWK

Our guild is collecting colourful pillowcases for our local children's hospital in support of "Ryan's Case for Smiles" towards their September 2019 goal to sew as many "MILES" of pillowcases as possible.   FYI, 2122 pillowcases = one mile.


I have seven ready to hand in at tonight's guild meeting.  They looked nice hanging on the line to dry today.  I couldn't decide which picture I liked best so here are both of them.  This was taken when I  hung them out in dappled shade this morning.


And this one was taken just before I brought them in this afternoon sparkling in the sunshine.


Since I dried them on the line they were a little wrinkled so I ironed them and they smelled so good fresh off the line.

I have two more almost complete which I'll hand in at a later date.  I have to complete the French seams and wash them.

Saturday 7 September 2019

Progress on Ainsley and Jack's Wedding Quilt Label

Right after picking my goals for September, I got to work on my number one goal.  I finalised the text for the quilt label on the computer using Bradley Hand ITC font and printed it out intending to use my light box to trace the text onto the quilt label with a wash out marker.  However, the background fabric is a very dense white tone on tone and I could not see the text through it, so I had to come up with plan B.  Luckily I had been doing some tidying up of pattern papers last week and had come across dress making tracing paper which I am pretty sure had been bought for me when I was taking a sewing class in grade 9 Home Ec., 40+ years ago!  I pinned the text paper to the top of my label with the tracing paper in between and traced the text hard with a pen so the tracing paper would transfer to the fabric.  It's not very dark, but I think it will be good enough for me to follow.  I whited out their last names on the computer and my mouse skills are not great so excuse the scribbles.


Then I went off to buy some cotton embroidery floss.  I ended up with DMC 169, a grey the same colour as the darker grey corner triangles which I will embroider the "100% Cotton" with as it is not wedding info so I want it to fade into the background.  I might embroider the "To" in grey as well for balance.  Then I picked a violet I thought coordinated well with the central colours of violet in each of the four different violet rings.  It is DMC 327.  Here's a picture of the floss with the grey fabric and bits and pieces of the four leftover violet rings fabric.  Now to unearth an embroidery hoop.  I know there are several about.


Uh oh!  Now I am thinking of finding a simple embroidery pattern for lupin flowers as that is what the colours of the quilt are based on.  It would fit quite nicely in the top and/or bottom space left in the central white diamond.....  We shall see, I am very excited that progress is being made!

I am posting this at 9:15 am and it is already windy and grey and spitting rain as we wait for the full brunt of Hurricane Dorian to hit us at midnight tonight.  I should get plenty of embroidery time in this weekend.  I don't usually embroider, so have no idea how long it will take.

Thursday 5 September 2019

September Priorities

I hardly sewed at all this summer, which is not a bad thing, but there are some projects that need to move forward so I am making a list of priorities for September to see if this will get me back in the groove.

1.  Make a label for Ainsley and Jack's wedding quilt!!!  They had their first anniversary a couple of days ago..... so it's way overdue and yes I have been procrastinating.  The quilt was completed on time for their wedding but the label is still waiting.  The block for the label is all pieced and I know I want to embroider the text.  I just have to decide whether I am going to embroider it by machine which means I have to get out the manual and figure out how to do it or if I am going to embroider it by hand which means I need to trace the text onto the fabric and just get to it.  We are expecting Hurricane Dorian to hit us this Saturday and may have power outages, so maybe I should just go with hand embroidery.  OK, decision made!  This is working already!  Here's what the quilt looks like, well half of it anyway.  You can see all of my Double Wedding Ring / Metro Rings posts by clicking on this link.


2.  These next three items all have the deadline 19 September, which is our first guild meeting of the year:
  • Finish a few more pillow cases for "Ryan's Case for Smiles".  I have six completed and two more cut out and ready to sew.  Maybe I can make ten so I just need to look for fabric for two more.  See four I've made already by clicking on this link.
  • Make a bag for the guild challenge.  I have chosen the pattern which is fairly simple and have a few ideas for the fabric.  I can't show anything though because it's a secret!
  • Quilt a comfort quilt.  The top is already loaded on the frame and ready to go.  I think I have decided on a free motion quilting pattern.  It is called "Filament" and is by Christina Cameli.  See it here from her book "Step-by-Step Free-Motion Quilting by clicking this link.
3.  Quilt one of my own quilts.  I have several to choose from.  Maybe I can quilt one with the same free motion pattern as the comfort quilt so I will be all "practised up" and ready to go!

4.  Continue working on my Dear Jane Quilt which has been an on going project.  You can see all my Dear Jane posts by clicking on this link and here is a picture from my most recent post.  I have made more blocks since this picture.


5.  Start cutting the fabric for my son Bryan and fiance Catherine's quilt.  They are getting married on 18 July 2020.

OK, enough "talking", there is a quilt label to work on.