I have been wanting to try sewing with clear vinyl to make some project bags to easily carry around hand sewing or knitting projects. I decided to try this Windowed Zip Bag Tutorial by CraftyStaci. I made a mistake on my first bag and boxed the bottom corners way too deeply. The second bag turned out much better. I also used "Zippers by the Yard" for the first time.
The vinyl cut as easily as fabric with a rotary cutter. The problem was being able to see it to measure it properly and also it kept sticking to the ruler. Sewing with it was fine since it had fabric sandwiched on both sides of it but it was very slippery and I was glad I had some clips to hold the pieces together. It was a little bit fiddly getting zipper pulls onto the zipper tape but it was nice to be able to cut the zipper the exact length you wanted. The instructions for the bag have you sewing the seams and then zigzagging over them to finish them. I chose to sew them with French seams so the edges of the fabric were enclosed. This actually makes the bag stand up better on it's own because it made sturdy tubes out of the seams.
Here's a picture of the back of one of the bags.
I think I will be making a few more of these in various sizes in the future.
Tuesday 29 January 2019
Wednesday 23 January 2019
HRT's (Half-Rectangle Triangles) and Comfort Quilts
At my last Guild meeting, my buddy Marilyn and I gave a demo on how to make Half-Rectangle Triangles based on an HRT tutorial found on the blog "Buttons & Butterflies" by Heide Grohs. Here is the process using construction paper instead of fabric. You can make any size rectangle by starting with two rectangles cut 1/2" wider and 1/4" longer than the unfinished size of rectangle you want to end up with.
It was decided we would make light yellow and blue HRT's for our next meeting starting with 5" by 10" rectangles. Here are the ones I made:
The previous month we were collecting striped 12.5 " unfinished star blocks made in any manner and we were one short, so I decided to make one using HRTs paired as the star legs. I cut out four pairs of rectangles measuring 4.75" x 3" in order to end of with 4.5" x 2.5" star legs which paired together to make 4.5" squares.
And here is the finished star made with 4.5" squares of fabric.
I had a comfort quilt top which had been put together the last time our guild had a comfort quilt sew day and on Monday, I pieced a backing and got it loaded on my frame and finished quilting loops on it by lunch time. After lunch, I got the binding on and put it in the washer. It went together way more quickly than I imagined. Here's a picture of it all finished. The blocks are 6.5" unfinished so the quilt is approximately 42" x 60". I didn't measure it after shrinkage.
And here's a close up to see the backing, binding and the loopy quilting.
Since I had some backing fabric left over, I decided to make another star block. Plaid fabric is just fabric with stripes going in two directions right? Double stripes.
Now, to get some more finished tops onto the frame and get them quilted as well!
Thursday 17 January 2019
Dear Jane Quilt, C3, C4, C5, C6 and C7
I didn't get a lot of work done on my Dear Jane Quilt the last half of 2018, but I want to rectify that in 2019. My 2nd "blog-aversarie" was yesterday so this could be seen as a resolution of sorts.
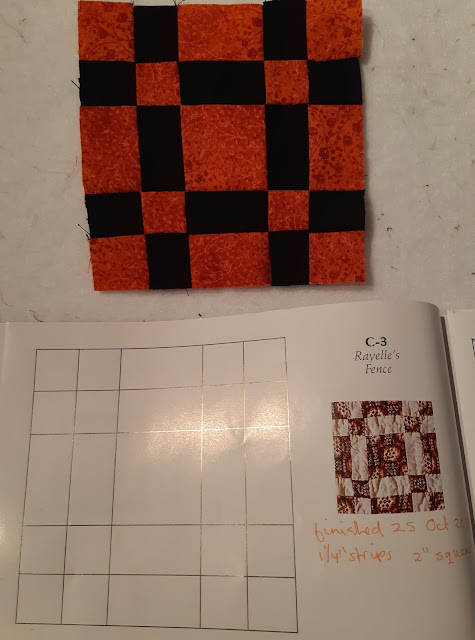
C3 is a very simple block and I did a bit of strip piecing to put it together.
C3 close up.
The centre of C4 is simple strip piecing and then I chose to paper piece the octagon border.
C4 close up.
C5 started out simply enough with half square triangles which I then cut with my drunkards path templates making sure that the colours alternated. I then reverse appliqued the outer black curve on top of each quarter section and then sewed the sections together.
C5 close up.
For C6, I sewed the black orange peel to the corner pieces and then sewed the corner pieces to the central piece. The curves are quite gentle so I had no issues. There is the tiniest of pleats near one edge which will end up in the seam allowance.
C6 close up.
C7 has a lot of tiny pieces. I paper pieced the diamonds framing the central square. Before adding the corner triangles, I reverse appliqued the larger diamonds.
C7 close up.
For blocks C5, C6 and C7, I used a website I just discovered which has printable templates nicely drawn to scale for paper piecing and applique. It can be found here:
http://www.susangatewood.net/mypatterns.html Susan Gatewood shares a lot of useful information and her website is well worth looking at if you are making or thinking of making a Dear Jane Quilt.
And best of all I am still enjoying making the Dear Jane blocks.
Sunday 13 January 2019
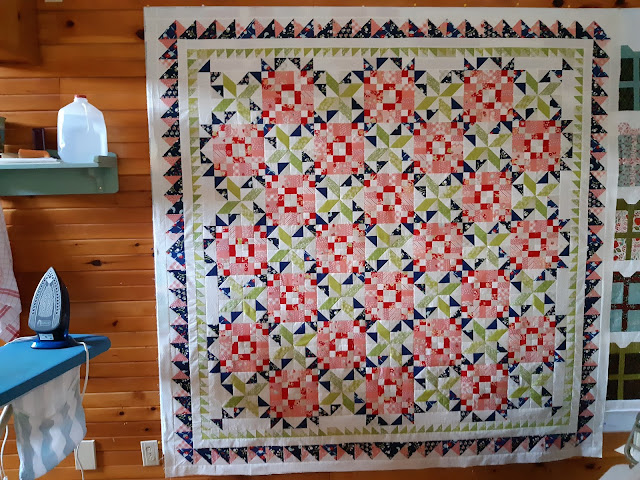
Bonnie Hunter's Quiltville Mystery "Good Fortune" - My Top is Finished
I got the final border attached to the Good Fortune Quilt on 11 January, but I didn't get it ironed and in photo condition. On 12 February, I added an extra background border to echo the plain border before the last pieced border. It will also prevent all the little seams in the border the possibility of unravelling and make binding the quilt much easier in the end.
I am still toying with adding some additional borders to bring the quilt up to bed size use, but for now I am counting this quilt as finished piecing and awaiting quilting. It is currently 77" square.
#quiltville #quiltvillemystery #goodfortunequilt
Linking to http://quiltville.blogspot.com/2019/01/mystery-monday-link-up-reveal-2.html
Wednesday 9 January 2019
Bonnie Hunter's Quiltville Mystery "Good Fortune", 3 of 4 Borders On
Yesterday I was able to get the first border of Good Fortune together and attached to the quilt.
This morning I got the second green saw tooth border made and attached to the quilt. This afternoon, I was skype sewing with my friend Marilyn and I got the third plain border on and got the entire fourth border pieced together so tomorrow all I have to do is sew it on and the quilt will be complete as per Bonnie Hunter's instructions.
I have decided I will then add a fifth plain border same as the third border which will make it easier to quilt and bind. Since I have lots of fabrc left, Marilyn and I also talked about a few extra borders I could make if I felt so inclined as to make it bigger.....
#quiltville #quiltvillemystery #goodfortunequilt
Monday 7 January 2019
Bonnie Hunter's Quiltville Mystery "Good Fortune" Centre Completed
This morning I started sewing the cool and warm blocks of Good Fortune into pairs making sure to save a few as singles since the rows are made up of odd numbers.
This afternoon I got all the rows sewn and then all the rows sewn to each other.
Here's a close up of some of the blocks.
I like how you can follow the small neutral squares diagonally across the quilt. I think I like the cool blocks better than the warm blocks. Now to start putting the borders together.
#quiltville #quiltvillemystery #goodfortunequilt
Sunday 6 January 2019
Bonnie Hunter's Quiltville Mystery "Good Fortune" - All the Blocks Made
Today I finished putting together all the cool and warm blocks for the Good Fortune Quilt.
On my design wall, you can see some other quilts I have been working on.
#quiltville #quiltvillemystery #goodfortunequilt
Linking to http://quiltville.blogspot.com/2019/01/mystery-monday-link-up-reveal.html
On my design wall, you can see some other quilts I have been working on.
#quiltville #quiltvillemystery #goodfortunequilt
Linking to http://quiltville.blogspot.com/2019/01/mystery-monday-link-up-reveal.html
Friday 4 January 2019
Bonnie Hunter's Quiltville Mystery "Good Fortune", Steps 7 & 8
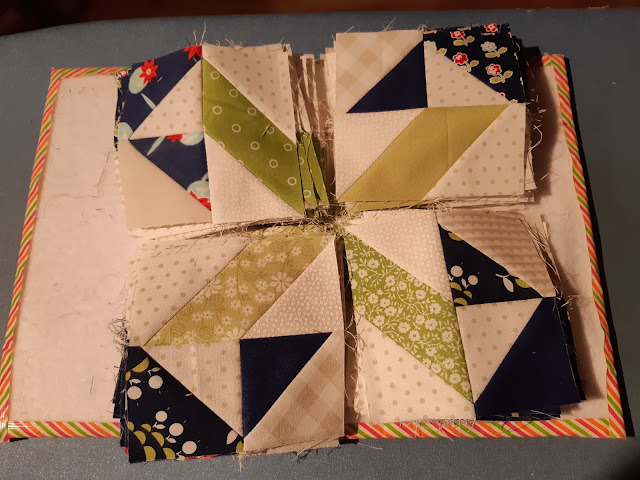
Step 7 was a "surprise step" for the Good Fortune Quilt and came out on New Year's Day. It involved sewing together some of the red and blue pieces that had already been made. Here is what I sewed together.
Step 8 came out as usual on Friday and was the full reveal of the quilt and the rest of the assembly instructions. The quilt is made out of two distinct blocks surrounded by several borders. One block is made with the warm red and orange fabrics (red and peach in my case). Here is my first complete warm block.
And here are the rest of the pieces for the warm blocks. Only two more seams and each block will be fully assembled.

The second block is made with the cool fabrics in blues and greens Here is my first completed cool block.
And here are the rest of the pieces for the cool blocks. Only three seams and each of these blocks will be completed.
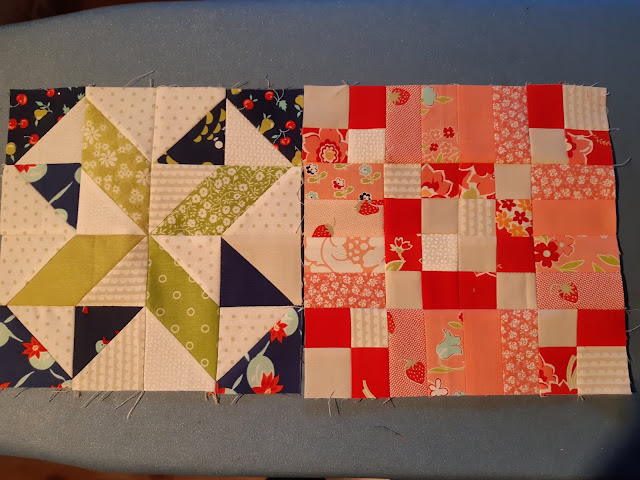
Here are the two blocks together.
If you want to see the reveal, click on the Good Fortune link in the first line of the blog. Or, you can always wait for my reveal. It may take a little while though.....
#quiltville #quiltvillemystery #goodfortunequilt
Step 8 came out as usual on Friday and was the full reveal of the quilt and the rest of the assembly instructions. The quilt is made out of two distinct blocks surrounded by several borders. One block is made with the warm red and orange fabrics (red and peach in my case). Here is my first complete warm block.
And here are the rest of the pieces for the warm blocks. Only two more seams and each block will be fully assembled.

The second block is made with the cool fabrics in blues and greens Here is my first completed cool block.
And here are the rest of the pieces for the cool blocks. Only three seams and each of these blocks will be completed.
Here are the two blocks together.
If you want to see the reveal, click on the Good Fortune link in the first line of the blog. Or, you can always wait for my reveal. It may take a little while though.....
#quiltville #quiltvillemystery #goodfortunequilt
Subscribe to:
Posts (Atom)


